Building from Source
Building the Greenbone Community Edition from source requires knowledge about:
Using a terminal
Shell programming basics
Installing software via apt or dnf
Using a C compiler
Using CMake and make
Running services via systemd
Additionally, a basic knowledge about the architecture of the Greenbone Community Edition is required to follow this guide.
Note
This guide is intended for developers who want to try out the newest features and/or want to get familiar with the source code. It is not intended for production setups.
Currently the docs support the following distributions
Debian stable (bookworm)
Ubuntu 24.04 LTS
Fedora 38
CentOS 9 Stream
Most likely, other Debian derivatives like Mint and Kali will also work with only minor adjustments required.
Hardware Requirements
Minimal:
CPU Cores: 2
Random-Access Memory: 4GB
Hard Disk: 20GB free
Recommended:
CPU Cores: 4
Random-Access Memory: 8GB
Hard Disk: 60GB free
Prerequisites
Note
Please follow the guide step by step. Later steps might require settings or output of a previous command.
The command sudo is used for executing commands that require privileged
access on the system.
Creating a User and a Group
The services provided by the Greenbone Community Edition should run as a dedicated user and
group. Therefore a gvm user and a group with the same name will be created.
Adjusting the Current User
To allow the current user to run gvmd he must be added to the gvm group. To make the group change effective either logout and login again or use su.
sudo usermod -aG gvm $USER

su $USER
Setting Environment Variables
For easier installation and not having to repeat the same directory paths over and over again the build from source guide uses environment variables. These environment variables are used later in the guide.
Attention
If you close your linux shell/terminal or start a new one, for example due to a system reboot while following this guide, you need to set the environment variables again. Environment variables are only valid in your current shell/terminal.
Choosing an Install Prefix
Before building the software stack, a (root) directory must be chosen where
the built software will finally be installed. For example, when building packages,
the distribution developers set this path to /usr.
By default, it is /usr/local which is also used in this guide. This
directory will be stored in an environment variable INSTALL_PREFIX
to be able to reference it later.
export INSTALL_PREFIX=/usr/local
Setting the PATH
On Debian systems the locations /sbin, /usr/sbin and
/usr/local/sbin are not in the PATH of normal users. To run
gvmd which is located in /usr/local/sbin the PATH
environment variable should be adjusted.
export PATH=$PATH:$INSTALL_PREFIX/sbin
Setting a Source, Build and Install Directory
To separate the sources and the build artifacts, a source and a build directory must be created.
This source directory will be used later in this guide via
an environment variable SOURCE_DIR. Accordingly, a variable
BUILD_DIR will be set for the build directory. Both can be set to any
directory to which the current user has write permissions. Therefore
directories in the current user’s home directory are chosen in this guide.
export SOURCE_DIR=$HOME/source
mkdir -p $SOURCE_DIR
export BUILD_DIR=$HOME/build
mkdir -p $BUILD_DIR
Additionally, an install directory will be set as an environment variable
INSTALL_DIR. It is used as a temporary installation directory
before moving all built artifacts to the final destination.
export INSTALL_DIR=$HOME/install
mkdir -p $INSTALL_DIR
Choosing the Installation Source
For building the GVM software stack, three different sources can be chosen depending on the desired stability:
Building from release tarballs
Building from git tags
Building from release branches
Linux distributions use the release tarballs because it is the most common and well known method to share source code.
Newer build systems may stick with the git tags.
If you are a developer and very familiar with building from source already, you may also try out using the git release branches. These have the advantage that they contain the newest fixes which may not yet be included in the release tarballs or git tags. As a downside, the release branches may contain only partially fixed issues and need to be updated more often.
This guide will use the tarballs to build the software.
Installing Common Build Dependencies
For downloading, configuring, building and installing the Greenbone Community Edition components, several tools and applications are required. To install this requirements the following commands can be used:
sudo apt update
sudo apt install --no-install-recommends --assume-yes \
  build-essential \
  curl \
  cmake \
  pkg-config \
  python3 \
  python3-pip \
  gnupg
sudo dnf upgrade -y
sudo dnf groupinstall 'Development Tools' -y
sudo dnf install -y \
  cmake \
  python3-pip \
  tar \
  gcc-c++

sudo tee /etc/ld.so.conf.d/local.conf <<EOF
/usr/local/lib
/usr/local/lib64
EOF

sudo ldconfig

sudo dnf remove net-snmp net-snmp-devel
sudo dnf install -y \
  systemd \
  gcc \
  openssl-devel \
  bzip2-devel \
  elfutils-devel \
  libselinux-devel \
  elfutils-libelf-devel \
  rpm-devel \
  perl-devel \
  procps \
  python3-devel \
  python3-setuptools \
  chrpath \
  mariadb-connector-c-devel

curl -O https://netcologne.dl.sourceforge.net/project/net-snmp/net-snmp/5.9.1/net-snmp-5.9.1.tar.gz
tar xzf net-snmp-5.9.1.tar.gz
cd net-snmp-5.9.1
./configure
make sedscript
make -j$(nproc)
sudo make install
sudo dnf config-manager --set-enabled crb
sudo dnf install -y epel-release epel-next-release
sudo dnf upgrade -y
sudo dnf groupinstall 'Development Tools' -y
sudo dnf install -y \
  cmake \
  python3-pip \
  tar \
  gcc-c++ \
  doxygen \
  xmltoman

sudo tee /etc/ld.so.conf.d/local.conf <<EOF
/usr/local/lib
/usr/local/lib64
EOF

sudo ldconfig

sudo dnf remove net-snmp net-snmp-devel
sudo dnf install -y \
  systemd \
  gcc \
  openssl-devel \
  bzip2-devel \
  elfutils-devel \
  libselinux-devel \
  elfutils-libelf-devel \
  rpm-devel \
  perl-devel \
  procps \
  python3-devel \
  python3-setuptools \
  chrpath \
  mariadb-connector-c-devel

curl -O https://netcologne.dl.sourceforge.net/project/net-snmp/net-snmp/5.9.1/net-snmp-5.9.1.tar.gz
tar xzf net-snmp-5.9.1.tar.gz
cd net-snmp-5.9.1
./configure
make -j$(nproc)
sudo make install

curl -o paho.mqtt.c.tar.gz https://codeload.github.com/eclipse/paho.mqtt.c/tar.gz/refs/tags/v1.3.10
tar xzf paho.mqtt.c.tar.gz
cd paho.mqtt.c-1.3.10
mkdir build && cd build
cmake ..
make -j$(nproc)
sudo make install
Importing the Greenbone Signing Key
To validate the integrity of the downloaded source files, GnuPG is used. It requires downloading the Greenbone Community Signing public key and importing it into the current user’s keychain.
curl -f -L https://www.greenbone.net/GBCommunitySigningKey.asc -o /tmp/GBCommunitySigningKey.asc
gpg --import /tmp/GBCommunitySigningKey.asc
For understanding the validation output of the gpg tool, it is best to mark the Greenbone Community Signing key as fully trusted.
echo "8AE4BE429B60A59B311C2E739823FAA60ED1E580:6:" | gpg --import-ownertrust
Building and Installing the Components
Note
The components should be build and installed in the listed order.
gvm-libs
gvm-libs is a C library providing basic functionality like XML parsing and network communication. It is used in openvas-scanner, gvmd, gsad and pg-gvm.
export GVM_LIBS_VERSION=22.31.1
sudo apt install -y \
  libcjson-dev \
  libcurl4-gnutls-dev \
  libgcrypt-dev \
  libglib2.0-dev \
  libgnutls28-dev \
  libgpgme-dev \
  libhiredis-dev \
  libnet1-dev \
  libpaho-mqtt-dev \
  libpcap-dev \
  libssh-dev \
  libxml2-dev \
  uuid-dev
sudo apt install -y \
  libldap2-dev \
  libradcli-dev
sudo dnf install -y \
  cjson-devel \
  glib2-devel \
  gnutls-devel \
  gpgme-devel \
  hiredis-devel \
  libcurl-devel \
  libgcrypt-devel \
  libnet-devel \
  libpcap-devel \
  libssh-devel \
  libuuid-devel \
  libxml2-devel \
  paho-c-devel
sudo dnf install -y \
  openldap-devel \
  radcli-devel
sudo dnf install -y \
  cjson-devel \
  glib2-devel \
  gnutls-devel \
  gpgme-devel \
  hiredis-devel \
  libcurl-devel \
  libgcrypt-devel \
  libnet-devel \
  libpcap-devel \
  libssh-devel \
  libuuid-devel \
  libxml2-devel \
  uuid-devel
sudo dnf install -y \
  openldap-devel \
  radcli-devel
curl -f -L https://github.com/greenbone/gvm-libs/archive/refs/tags/v$GVM_LIBS_VERSION.tar.gz -o $SOURCE_DIR/gvm-libs-$GVM_LIBS_VERSION.tar.gz
curl -f -L https://github.com/greenbone/gvm-libs/releases/download/v$GVM_LIBS_VERSION/gvm-libs-$GVM_LIBS_VERSION.tar.gz.asc -o $SOURCE_DIR/gvm-libs-$GVM_LIBS_VERSION.tar.gz.asc
gpg --verify $SOURCE_DIR/gvm-libs-$GVM_LIBS_VERSION.tar.gz.asc $SOURCE_DIR/gvm-libs-$GVM_LIBS_VERSION.tar.gz
The output of the last command should be similar to:
If the signature is valid, the tarball can be extracted.
tar -C $SOURCE_DIR -xvzf $SOURCE_DIR/gvm-libs-$GVM_LIBS_VERSION.tar.gz
Afterwards, gvm-libs can be build and installed.
mkdir -p $BUILD_DIR/gvm-libs

cmake \
  -S $SOURCE_DIR/gvm-libs-$GVM_LIBS_VERSION \
  -B $BUILD_DIR/gvm-libs \
  -DCMAKE_INSTALL_PREFIX=$INSTALL_PREFIX \
  -DCMAKE_BUILD_TYPE=Release \
  -DSYSCONFDIR=/etc \
  -DLOCALSTATEDIR=/var

cmake --build $BUILD_DIR/gvm-libs -j$(nproc)
mkdir -p $BUILD_DIR/gvm-libs && cd $BUILD_DIR/gvm-libs

cmake $SOURCE_DIR/gvm-libs-$GVM_LIBS_VERSION \
  -DCMAKE_INSTALL_PREFIX=$INSTALL_PREFIX \
  -DCMAKE_BUILD_TYPE=Release \
  -DSYSCONFDIR=/etc \
  -DLOCALSTATEDIR=/var \
  -DCMAKE_C_FLAGS="-O2" \
  -DCMAKE_C_FLAGS_RELEASE="-O2"

make -j$(nproc)
mkdir -p $INSTALL_DIR/gvm-libs && cd $BUILD_DIR/gvm-libs

make DESTDIR=$INSTALL_DIR/gvm-libs install

sudo cp -rv $INSTALL_DIR/gvm-libs/* /
gvmd
The Greenbone Vulnerability Management Daemon (gvmd) is the main service of the Greenbone Community Edition. It handles authentication, scan management, vulnerability information, reporting, alerting, scheduling and much more. As a storage backend, it uses a PostgreSQL database.
export GVMD_VERSION=26.10.0
sudo apt install -y \
  libbsd-dev \
  libcjson-dev \
  libglib2.0-dev \
  libgnutls28-dev \
  libgpgme-dev \
  libical-dev \
  libpq-dev \
  postgresql-server-dev-all \
  rsync \
  xsltproc
sudo apt install -y --no-install-recommends \
  dpkg \
  fakeroot \
  gnupg \
  gnutls-bin \
  gpgsm \
  nsis \
  openssh-client \
  python3 \
  python3-lxml \
  rpm \
  smbclient \
  snmp \
  socat \
  sshpass \
  texlive-fonts-recommended \
  texlive-latex-extra \
  wget \
  xmlstarlet \
  zip
sudo dnf install -y \
  glib2-devel \
  gnutls-devel \
  postgresql-server-devel \
  libical-devel \
  xsltproc \
  rsync \
  libbsd-devel \
  gpgme-devel
sudo dnf install -y --setopt=install_weak_deps=False \
  texlive-scheme-medium \
  texlive-fontawesome \
  texlive-fontmfizz \
  texlive-fonts-churchslavonic \
  texlive-fontsetup \
  texlive-fontsize \
  texlive-fonttable \
  fontawesome-fonts \
  gnupg2-smime \
  openssh-clients \
  xmlstarlet \
  zip \
  rpm \
  fakeroot \
  dpkg \
  mingw64-nsis \
  gnupg \
  wget \
  sshpass \
  socat \
  samba-client \
  python3-lxml \
  gnutls-utils
sudo dnf install -y \
  glib2-devel \
  gnutls-devel \
  postgresql-server-devel \
  libical-devel \
  libxslt \
  rsync \
  libbsd-devel \
  gpgme-devel
sudo dnf install -y --setopt=install_weak_deps=False \
  texlive* \
  gnupg2-smime \
  openssh-clients \
  xmlstarlet \
  zip \
  rpm \
  fakeroot \
  dpkg \
  gnupg \
  wget \
  sshpass \
  socat \
  samba-client \
  python3-lxml \
  gnutls-utils
Details about the optional dependencies can be found at https://github.com/greenbone/gvmd/blob/stable/INSTALL.md#prerequisites-for-optional-features.
curl -f -L https://github.com/greenbone/gvmd/archive/refs/tags/v$GVMD_VERSION.tar.gz -o $SOURCE_DIR/gvmd-$GVMD_VERSION.tar.gz
curl -f -L https://github.com/greenbone/gvmd/releases/download/v$GVMD_VERSION/gvmd-$GVMD_VERSION.tar.gz.asc -o $SOURCE_DIR/gvmd-$GVMD_VERSION.tar.gz.asc
gpg --verify $SOURCE_DIR/gvmd-$GVMD_VERSION.tar.gz.asc $SOURCE_DIR/gvmd-$GVMD_VERSION.tar.gz
The output of the last command should be similar to:
If the signature is valid the tarball can be extracted.
tar -C $SOURCE_DIR -xvzf $SOURCE_DIR/gvmd-$GVMD_VERSION.tar.gz
mkdir -p $BUILD_DIR/gvmd

cmake \
  -S $SOURCE_DIR/gvmd-$GVMD_VERSION \
  -B $BUILD_DIR/gvmd \
  -DCMAKE_INSTALL_PREFIX=$INSTALL_PREFIX \
  -DCMAKE_BUILD_TYPE=Release \
  -DLOCALSTATEDIR=/var \
  -DSYSCONFDIR=/etc \
  -DGVM_DATA_DIR=/var \
  -DGVM_LOG_DIR=/var/log/gvm \
  -DGVMD_RUN_DIR=/run/gvmd \
  -DOPENVAS_DEFAULT_SOCKET=/run/ospd/ospd-openvas.sock \
  -DGVM_FEED_LOCK_PATH=/var/lib/gvm/feed-update.lock \
  -DLOGROTATE_DIR=/etc/logrotate.d

cmake --build $BUILD_DIR/gvmd -j$(nproc)
mkdir -p $BUILD_DIR/gvmd && cd $BUILD_DIR/gvmd

cmake $SOURCE_DIR/gvmd-$GVMD_VERSION \
  -DCMAKE_INSTALL_PREFIX=$INSTALL_PREFIX \
  -DCMAKE_BUILD_TYPE=Release \
  -DLOCALSTATEDIR=/var \
  -DSYSCONFDIR=/etc \
  -DGVM_DATA_DIR=/var \
  -DGVM_LOG_DIR=/var/log/gvm \
  -DGVMD_RUN_DIR=/run/gvmd \
  -DOPENVAS_DEFAULT_SOCKET=/run/ospd/ospd-openvas.sock \
  -DGVM_FEED_LOCK_PATH=/var/lib/gvm/feed-update.lock \
  -DSYSTEMD_SERVICE_DIR=/lib/systemd/system \
  -DLOGROTATE_DIR=/etc/logrotate.d

sudo mkdir /usr/include/postgresql
sudo cp /usr/include/libpq-fe.h /usr/include/postgresql/libpq-fe.h

make -j$(nproc)
mkdir -p $INSTALL_DIR/gvmd && cd $BUILD_DIR/gvmd

make DESTDIR=$INSTALL_DIR/gvmd install

sudo cp -rv $INSTALL_DIR/gvmd/* /
mkdir -p $INSTALL_DIR/gvmd

make DESTDIR=$INSTALL_DIR/gvmd install

sudo cp -rv $INSTALL_DIR/gvmd/* /


sudo rm /usr/include/postgresql/libpq-fe.h && sudo rmdir /usr/include/postgresql
pg-gvm
pg-gvm is a PostgreSQL server extension that adds several functions used by gvmd, e.g., iCalendar and host range evaluation. In previous versions, these functions were managed directly by gvmd while pg-gvm uses the extension management built into PostgreSQL.
export PG_GVM_VERSION=22.6.9
sudo apt install -y \
  libglib2.0-dev \
  libical-dev \
  postgresql-server-dev-all
sudo dnf install -y \
  glib2-devel \
  gnutls-devel \
  libical-devel \
  postgresql-server-devel
curl -f -L https://github.com/greenbone/pg-gvm/archive/refs/tags/v$PG_GVM_VERSION.tar.gz -o $SOURCE_DIR/pg-gvm-$PG_GVM_VERSION.tar.gz
curl -f -L https://github.com/greenbone/pg-gvm/releases/download/v$PG_GVM_VERSION/pg-gvm-$PG_GVM_VERSION.tar.gz.asc -o $SOURCE_DIR/pg-gvm-$PG_GVM_VERSION.tar.gz.asc
gpg --verify $SOURCE_DIR/pg-gvm-$PG_GVM_VERSION.tar.gz.asc $SOURCE_DIR/pg-gvm-$PG_GVM_VERSION.tar.gz
The output of the last command should be similar to:
If the signature is valid the tarball can be extracted.
tar -C $SOURCE_DIR -xvzf $SOURCE_DIR/pg-gvm-$PG_GVM_VERSION.tar.gz
Afterwards, pg-gvm can be build and installed.
mkdir -p $BUILD_DIR/pg-gvm

cmake \
  -S $SOURCE_DIR/pg-gvm-$PG_GVM_VERSION \
  -B $BUILD_DIR/pg-gvm \
  -DCMAKE_BUILD_TYPE=Release

cmake --build $BUILD_DIR/pg-gvm -j$(nproc)
mkdir -p $BUILD_DIR/pg-gvm && cd $BUILD_DIR/pg-gvm

cmake $SOURCE_DIR/pg-gvm-$PG_GVM_VERSION \
  -DCMAKE_BUILD_TYPE=Release

make -j$(nproc)
mkdir -p $INSTALL_DIR/pg-gvm && cd $BUILD_DIR/pg-gvm

make DESTDIR=$INSTALL_DIR/pg-gvm install

sudo cp -rv $INSTALL_DIR/pg-gvm/* /
Greenbone Security Assistant
The Greenbone Security Assistant (GSA) sources consist of two parts:
Web server gsad
Web application GSA
GSA
The web application is written in JavaScript and relies on the react framework. It uses nodejs for building the application and maintaining the JavaScript dependencies. Because the installation of a specific nodejs version requires a setup of external package repositories and the build process takes a lot of time, pre-built distributable files are available. These pre-built distributable files are used in this docs.
export GSA_VERSION=25.0.0
curl -f -L https://github.com/greenbone/gsa/releases/download/v$GSA_VERSION/gsa-dist-$GSA_VERSION.tar.gz -o $SOURCE_DIR/gsa-$GSA_VERSION.tar.gz
curl -f -L https://github.com/greenbone/gsa/releases/download/v$GSA_VERSION/gsa-dist-$GSA_VERSION.tar.gz.asc -o $SOURCE_DIR/gsa-$GSA_VERSION.tar.gz.asc
gpg --verify $SOURCE_DIR/gsa-$GSA_VERSION.tar.gz.asc $SOURCE_DIR/gsa-$GSA_VERSION.tar.gz
The output of both commands should be similar to:
If the signatures are valid, the two tarballs can be extracted.
mkdir -p $SOURCE_DIR/gsa-$GSA_VERSION
tar -C $SOURCE_DIR/gsa-$GSA_VERSION -xvzf $SOURCE_DIR/gsa-$GSA_VERSION.tar.gz
sudo mkdir -p $INSTALL_PREFIX/share/gvm/gsad/web/
sudo cp -rv $SOURCE_DIR/gsa-$GSA_VERSION/* $INSTALL_PREFIX/share/gvm/gsad/web/
gsad
The web server gsad is written in the C programming language. It serves static content like images and provides an API for the web application. Internally it communicates with gvmd using GMP.
export GSAD_VERSION=24.3.0
sudo apt install -y \
  libbrotli-dev \
  libglib2.0-dev \
  libgnutls28-dev \
  libmicrohttpd-dev \
  libxml2-dev
sudo firewall-cmd --add-port=9392/tcp
sudo firewall-cmd --runtime-to-permanent

sudo dnf install -y \
  glib2-devel \
  gnutls-devel \
  libmicrohttpd-devel \
  libxml2-devel
curl -f -L https://github.com/greenbone/gsad/archive/refs/tags/v$GSAD_VERSION.tar.gz -o $SOURCE_DIR/gsad-$GSAD_VERSION.tar.gz
curl -f -L https://github.com/greenbone/gsad/releases/download/v$GSAD_VERSION/gsad-$GSAD_VERSION.tar.gz.asc -o $SOURCE_DIR/gsad-$GSAD_VERSION.tar.gz.asc
gpg --verify $SOURCE_DIR/gsad-$GSAD_VERSION.tar.gz.asc $SOURCE_DIR/gsad-$GSAD_VERSION.tar.gz
The output of both commands should be similar to:
If the signatures are valid, the two tarballs can be extracted.
tar -C $SOURCE_DIR -xvzf $SOURCE_DIR/gsad-$GSAD_VERSION.tar.gz
mkdir -p $BUILD_DIR/gsad

cmake \
  -S $SOURCE_DIR/gsad-$GSAD_VERSION \
  -B $BUILD_DIR/gsad \
  -DCMAKE_INSTALL_PREFIX=$INSTALL_PREFIX \
  -DCMAKE_BUILD_TYPE=Release \
  -DSYSCONFDIR=/etc \
  -DLOCALSTATEDIR=/var \
  -DGVMD_RUN_DIR=/run/gvmd \
  -DGSAD_RUN_DIR=/run/gsad \
  -DGVM_LOG_DIR=/var/log/gvm \
  -DLOGROTATE_DIR=/etc/logrotate.d

cmake --build $BUILD_DIR/gsad -j$(nproc)
mkdir -p $INSTALL_DIR/gsad && cd $BUILD_DIR/gsad

make DESTDIR=$INSTALL_DIR/gsad install

sudo cp -rv $INSTALL_DIR/gsad/* /
openvas-smb
openvas-smb is a helper module for openvas-scanner. It includes libraries (openvas-wmiclient/openvas-wincmd) to interface with Microsoft Windows Systems through the Windows Management Instrumentation API and a winexe binary to execute processes remotely on that system.
It is an optional dependency of openvas-scanner but is required for scanning Windows-based systems.
Warning
openvas-smb doesn’t work on CentOS at the moment! It is not a hard requirement.
export OPENVAS_SMB_VERSION=22.5.3
sudo apt install -y \
  gcc-mingw-w64 \
  libgnutls28-dev \
  libglib2.0-dev \
  libpopt-dev \
  libunistring-dev \
  heimdal-multidev \
  perl-base
curl -f -L https://github.com/greenbone/openvas-smb/archive/refs/tags/v$OPENVAS_SMB_VERSION.tar.gz -o $SOURCE_DIR/openvas-smb-$OPENVAS_SMB_VERSION.tar.gz
curl -f -L https://github.com/greenbone/openvas-smb/releases/download/v$OPENVAS_SMB_VERSION/openvas-smb-v$OPENVAS_SMB_VERSION.tar.gz.asc -o $SOURCE_DIR/openvas-smb-$OPENVAS_SMB_VERSION.tar.gz.asc
gpg --verify $SOURCE_DIR/openvas-smb-$OPENVAS_SMB_VERSION.tar.gz.asc $SOURCE_DIR/openvas-smb-$OPENVAS_SMB_VERSION.tar.gz
The output of the last command should be similar to:
If the signature is valid, the tarball can be extracted.
tar -C $SOURCE_DIR -xvzf $SOURCE_DIR/openvas-smb-$OPENVAS_SMB_VERSION.tar.gz
mkdir -p $BUILD_DIR/openvas-smb

cmake \
  -S $SOURCE_DIR/openvas-smb-$OPENVAS_SMB_VERSION \
  -B $BUILD_DIR/openvas-smb \
  -DCMAKE_INSTALL_PREFIX=$INSTALL_PREFIX \
  -DCMAKE_BUILD_TYPE=Release

cmake --build $BUILD_DIR/openvas-smb -j$(nproc)
mkdir -p $INSTALL_DIR/openvas-smb && cd $BUILD_DIR/openvas-smb

make DESTDIR=$INSTALL_DIR/openvas-smb install

sudo cp -rv $INSTALL_DIR/openvas-smb/* /
openvas-scanner
openvas-scanner is a full-featured scan engine that executes a continuously updated and extended feed of Vulnerability Tests (VTs). The feed consist of thousands of NASL (Network Attack Scripting Language) scripts which implement all kind of vulnerability checks.
export OPENVAS_SCANNER_VERSION=23.20.1
sudo apt install -y \
  bison \
  libglib2.0-dev \
  libgnutls28-dev \
  libgcrypt20-dev \
  libpcap-dev \
  libgpgme-dev \
  libksba-dev \
  rsync \
  nmap \
  libjson-glib-dev \
  libcurl4-gnutls-dev \
  libbsd-dev \
  krb5-multidev
sudo apt install -y \
  python3-impacket \
  libsnmp-dev
sudo dnf install -y \
  bison \
  glib2-devel \
  gnutls-devel \
  libgcrypt-devel \
  libpcap-devel \
  gpgme-devel \
  libksba-devel \
  rsync \
  nmap \
  json-glib-devel \
  libcurl-devel \
  libbsd-devel \
  krb5-devel
sudo dnf install -y \
  python3-impacket
sudo dnf install -y \
  bison \
  glib2-devel \
  gnutls-devel \
  libgcrypt-devel \
  libpcap-devel \
  gpgme-devel \
  libksba-devel \
  rsync \
  nmap \
  json-glib-devel \
  libcurl-devel \
  libbsd-devel \
  krb5-devel
curl -f -L https://github.com/greenbone/openvas-scanner/archive/refs/tags/v$OPENVAS_SCANNER_VERSION.tar.gz -o $SOURCE_DIR/openvas-scanner-$OPENVAS_SCANNER_VERSION.tar.gz
curl -f -L https://github.com/greenbone/openvas-scanner/releases/download/v$OPENVAS_SCANNER_VERSION/openvas-scanner-v$OPENVAS_SCANNER_VERSION.tar.gz.asc -o $SOURCE_DIR/openvas-scanner-$OPENVAS_SCANNER_VERSION.tar.gz.asc
gpg --verify $SOURCE_DIR/openvas-scanner-$OPENVAS_SCANNER_VERSION.tar.gz.asc $SOURCE_DIR/openvas-scanner-$OPENVAS_SCANNER_VERSION.tar.gz
The output of the last command should be similar to:
If the signature is valid, the tarball can be extracted.
tar -C $SOURCE_DIR -xvzf $SOURCE_DIR/openvas-scanner-$OPENVAS_SCANNER_VERSION.tar.gz
mkdir -p $BUILD_DIR/openvas-scanner

cmake \
  -S $SOURCE_DIR/openvas-scanner-$OPENVAS_SCANNER_VERSION \
  -B $BUILD_DIR/openvas-scanner \
  -DCMAKE_INSTALL_PREFIX=$INSTALL_PREFIX \
  -DCMAKE_BUILD_TYPE=Release \
  -DSYSCONFDIR=/etc \
  -DLOCALSTATEDIR=/var \
  -DOPENVAS_FEED_LOCK_PATH=/var/lib/openvas/feed-update.lock \
  -DOPENVAS_RUN_DIR=/run/ospd

cmake --build $BUILD_DIR/openvas-scanner -j$(nproc)
mkdir -p $INSTALL_DIR/openvas-scanner && cd $BUILD_DIR/openvas-scanner

make DESTDIR=$INSTALL_DIR/openvas-scanner install

sudo cp -rv $INSTALL_DIR/openvas-scanner/* /
As of version 23.0 the openvasd_server configuration needs to be set to a running OpenVASD instance.
printf "table_driven_lsc = yes\n" | sudo tee /etc/openvas/openvas.conf
printf "openvasd_server = http://127.0.0.1:3000\n" | sudo tee -a /etc/openvas/openvas.conf
ospd-openvas
ospd-openvas is an OSP server implementation to allow gvmd to remotely control an openvas-scanner. It is running as a daemon and waits for incoming OSP requests from gvmd.
export OSPD_OPENVAS_VERSION=22.9.0
sudo apt install -y \
  python3 \
  python3-pip \
  python3-setuptools \
  python3-packaging \
  python3-wrapt \
  python3-cffi \
  python3-psutil \
  python3-lxml \
  python3-defusedxml \
  python3-paramiko \
  python3-redis \
  python3-gnupg \
  python3-paho-mqtt
sudo dnf install -y \
  python3 \
  python3-pip \
  python3-setuptools \
  python3-packaging \
  python3-wrapt \
  python3-cffi \
  python3-psutil \
  python3-lxml \
  python3-defusedxml \
  python3-paramiko \
  python3-redis \
  python3-gnupg \
  python3-paho-mqtt
sudo dnf install -y \
  python3 \
  python3-pip \
  python3-setuptools \
  python3-packaging \
  python3-wrapt \
  python3-cffi \
  python3-psutil \
  python3-lxml \
  python3-defusedxml \
  python3-paramiko \
  python3-redis \
  python3-gnupg \
  python3-wheel
curl -f -L https://github.com/greenbone/ospd-openvas/archive/refs/tags/v$OSPD_OPENVAS_VERSION.tar.gz -o $SOURCE_DIR/ospd-openvas-$OSPD_OPENVAS_VERSION.tar.gz
curl -f -L https://github.com/greenbone/ospd-openvas/releases/download/v$OSPD_OPENVAS_VERSION/ospd-openvas-v$OSPD_OPENVAS_VERSION.tar.gz.asc -o $SOURCE_DIR/ospd-openvas-$OSPD_OPENVAS_VERSION.tar.gz.asc
gpg --verify $SOURCE_DIR/ospd-openvas-$OSPD_OPENVAS_VERSION.tar.gz.asc $SOURCE_DIR/ospd-openvas-$OSPD_OPENVAS_VERSION.tar.gz
The output of the last command should be similar to:
If the signatures are valid, the tarballs can be extracted.
tar -C $SOURCE_DIR -xvzf $SOURCE_DIR/ospd-openvas-$OSPD_OPENVAS_VERSION.tar.gz
cd $SOURCE_DIR/ospd-openvas-$OSPD_OPENVAS_VERSION

mkdir -p $INSTALL_DIR/ospd-openvas

python3 -m pip install --root=$INSTALL_DIR/ospd-openvas --no-warn-script-location .

sudo cp -rv $INSTALL_DIR/ospd-openvas/* /
cd $SOURCE_DIR/ospd-openvas-$OSPD_OPENVAS_VERSION

mkdir -p $INSTALL_DIR/ospd-openvas

python3 -m pip install --prefix=$INSTALL_PREFIX --root=$INSTALL_DIR/ospd-openvas --no-warn-script-location .

sudo cp -rv $INSTALL_DIR/ospd-openvas/* /
openvasd
OpenVASD is used for detecting vulnerable products.
Currently only the notus service is integrated into gvmd.
That means that openvas is using openvasd for static version checks if a scan with ssh credentials is started and packages got found.
If you want to enable the full functionality you either need to adapt the openvasd.service file and remove the --mode service_notus flag and create a configuration file within /etc/openvasd/openvasd.toml or adapt the arguments within openvasd.service if you don’t want to create a configuration file.
For more information see:
https://github.com/greenbone/openvas-scanner/tree/main/rust/src/openvasd
https://github.com/greenbone/openvas-scanner/blob/main/rust/examples/openvasd/config.example.toml
To use the recommended archive setup, you must have either Podman or Docker installed. If not, follow the instructions in build-doc.
export OPENVAS_DAEMON=23.20.0
Attention
For Debian systems you have to follow the rustup instructions because the default Rust version is too dated for OpenVASD
# Follow instructions of https://rustup.rs to install rustup and afterwards run

sudo apt install -y \
  pkg-config \
  libssl-dev

rustup update stable
sudo apt install -y \
  rustup \
  pkg-config \
  libssl-dev

rustup update stable
sudo dnf install -y \
  rustup \
  pkg-config \
  openssl-devel

rustup update stable
Attention
For CentOS systems you have to follow the rustup instructions because the default Rust version is too dated for OpenVASD
# Follow instructions of https://rustup.rs to install rustup and afterwards run

sudo dnf install -y \
  pkg-config \
  openssl-devel

rustup update stable
curl -f -L https://github.com/greenbone/openvas-scanner/archive/refs/tags/v$OPENVAS_DAEMON.tar.gz -o $SOURCE_DIR/openvas-scanner-$OPENVAS_DAEMON.tar.gz
curl -f -L https://github.com/greenbone/openvas-scanner/releases/download/v$OPENVAS_DAEMON/openvas-scanner-v$OPENVAS_DAEMON.tar.gz.asc -o $SOURCE_DIR/openvas-scanner-$OPENVAS_DAEMON.tar.gz.asc
gpg --verify $SOURCE_DIR/openvas-scanner-$OPENVAS_DAEMON.tar.gz.asc $SOURCE_DIR/openvas-scanner-$OPENVAS_DAEMON.tar.gz
The output of the last command should be similar to:
If the signature is valid, the tarball can be extracted.
tar -C $SOURCE_DIR -xvzf $SOURCE_DIR/openvas-scanner-$OPENVAS_DAEMON.tar.gz
mkdir -p $INSTALL_DIR/openvasd/usr/local/bin
cd $SOURCE_DIR/openvas-scanner-$OPENVAS_DAEMON/rust
make
cargo build --release

sudo cp -v ../../target/release/openvasd $INSTALL_DIR/openvasd/usr/local/bin/
sudo cp -v ../../target/release/scannerctl $INSTALL_DIR/openvasd/usr/local/bin/
sudo cp -rv $INSTALL_DIR/openvasd/* /
greenbone-feed-sync
The greenbone-feed-sync tool is a Python based script to download all
feed data from the Greenbone Community Feed to your local
machine. It is an improved version of two former shell scripts.
Note
greenbone-feed-sync is released independently of the Greenbone Community Edition. Therefore, the newest version is used.
sudo apt install -y \
  python3 \
  python3-pip
sudo dnf install -y \
  python3 \
  python3-pip
The latest version of greeenbone-feed-sync can be installed by using standard Python installation tool pip.
To install it system-wide for all users without running pip as root user, the following commands can be used:
mkdir -p $INSTALL_DIR/greenbone-feed-sync

python3 -m pip install --root=$INSTALL_DIR/greenbone-feed-sync --no-warn-script-location greenbone-feed-sync

sudo cp -rv $INSTALL_DIR/greenbone-feed-sync/* /
mkdir -p $INSTALL_DIR/greenbone-feed-sync

python3 -m pip install --prefix $INSTALL_PREFIX --root=$INSTALL_DIR/greenbone-feed-sync --no-warn-script-location greenbone-feed-sync

sudo cp -rv $INSTALL_DIR/greenbone-feed-sync/* /
gvm-tools
The Greenbone Vulnerability Management Tools, or gvm-tools in short, are a collection of tools that help with controlling Greenbone Community Edition installations or Greenbone Enterprise Appliances remotely.
Essentially, the tools aid accessing the communication protocols Greenbone Management Protocol (GMP) and Open Scanner Protocol (OSP).
gvm-tools are optional and not required for a functional GVM stack.
Note
gvm-tools is released independently of the Greenbone Community Edition. Therefore, the newest version is used.
sudo apt install -y \
  python3 \
  python3-lxml \
  python3-packaging \
  python3-paramiko \
  python3-pip \
  python3-setuptools \
  python3-venv
sudo dnf install -y \
  python3 \
  python3-lxml \
  python3-packaging \
  python3-paramiko \
  python3-pip \
  python3-setuptools
The latest version of gvm-tools can be installed for each user via the standard Python installation tool pip.
Alternatively to install it system-wide without running pip as root user, the following commands can be used:
mkdir -p $INSTALL_DIR/gvm-tools

python3 -m pip install --root=$INSTALL_DIR/gvm-tools --no-warn-script-location gvm-tools

sudo cp -rv $INSTALL_DIR/gvm-tools/* /
mkdir -p $INSTALL_DIR/gvm-tools

python3 -m pip install --prefix=$INSTALL_PREFIX --root=$INSTALL_DIR/gvm-tools --no-warn-script-location gvm-tools

sudo cp -rv $INSTALL_DIR/gvm-tools/* /
Performing a System Setup
Setting up the Redis Data Store
Looking at the Architecture, the Redis key/value storage is used by the scanner (openvas-scanner and ospd-openvas) for handling the VT information and scan results.
sudo apt install -y redis-server
sudo dnf install -y redis
sudo dnf install -y policycoreutils-python-utils
sudo semanage fcontext -a -f a -t redis_var_run_t -r s0 '/var/run/redis-openvas(/.*)?'

sudo sh -c 'cat << EOF > /etc/tmpfiles.d/redis-openvas.conf
d       /var/lib/redis/openvas   0750 redis redis - -
z       /var/lib/redis/openvas   0750 redis redis - -
d       /run/redis-openvas       0750 redis redis - -
z       /run/redis-openvas       0750 redis redis - -
EOF'

sudo systemd-tmpfiles  --create

sudo sh -c 'cat << EOF > /etc/systemd/system/redis-server@.service
[Unit]
Description=Redis persistent key-value database
After=network.target
After=network-online.target
Wants=network-online.target

[Service]
WorkingDirectory=/var/lib/redis/%i
ExecStart=/usr/bin/redis-server /etc/redis/redis-%i.conf --daemonize no --supervised systemd
ExecStop=/usr/libexec/redis-shutdown
Type=notify
User=redis
Group=redis
RuntimeDirectory=%i
RuntimeDirectoryMode=0755

[Install]
WantedBy=multi-user.target
EOF'
After installing the Redis server package, a specific configuration for the openvas-scanner must be added.
sudo cp $SOURCE_DIR/openvas-scanner-$OPENVAS_SCANNER_VERSION/config/redis-openvas.conf /etc/redis/
sudo chown redis:redis /etc/redis/redis-openvas.conf
echo "db_address = /run/redis-openvas/redis.sock" | sudo tee -a /etc/openvas/openvas.conf
sudo systemctl start redis-server@openvas.service
sudo systemctl enable redis-server@openvas.service
Additionally the gvm user must be able to access the redis unix socket at
/run/redis-openvas/redis.sock.
sudo usermod -aG redis gvm
Adjusting Permissions
For a system-wide multi-user installation, it must be ensured that the directory permissions are set correctly and are matching the group setup. All users of the group gvm should be able to read and write logs, lock files and data like VTs.
sudo mkdir -p /var/lib/notus
sudo mkdir -p /run/gvmd

sudo chown -R gvm:gvm /var/lib/gvm
sudo chown -R gvm:gvm /var/lib/openvas
sudo chown -R gvm:gvm /var/lib/notus
sudo chown -R gvm:gvm /var/log/gvm
sudo chown -R gvm:gvm /run/gvmd

sudo chmod -R g+srw /var/lib/gvm
sudo chmod -R g+srw /var/lib/openvas
sudo chmod -R g+srw /var/log/gvm
To allow all users of the group gvm access to the postgres database via the various gvmd commands, the permissions of the gvmd executable will be adjusted to always run as the gvm user and under the gvm group.
sudo chown gvm:gvm /usr/local/sbin/gvmd
sudo chmod 6750 /usr/local/sbin/gvmd
Feed Validation
For validating the feed content, a GnuPG keychain with the Greenbone Community Feed integrity key needs to be created.
curl -f -L https://www.greenbone.net/GBCommunitySigningKey.asc -o /tmp/GBCommunitySigningKey.asc

export GNUPGHOME=/tmp/openvas-gnupg
mkdir -p $GNUPGHOME

gpg --import /tmp/GBCommunitySigningKey.asc
echo "8AE4BE429B60A59B311C2E739823FAA60ED1E580:6:" | gpg --import-ownertrust

export OPENVAS_GNUPG_HOME=/etc/openvas/gnupg
sudo mkdir -p $OPENVAS_GNUPG_HOME
sudo cp -r /tmp/openvas-gnupg/* $OPENVAS_GNUPG_HOME/
sudo chown -R gvm:gvm $OPENVAS_GNUPG_HOME
Setting up sudo for Scanning
For vulnerability scanning, it is required to have several capabilities for which only root users are authorized, e.g., creating raw sockets. Therefore, a configuration will be added to allow the users of the gvm group to run the openvas-scanner application as root user via sudo.
Warning
Make sure that only necessary users have access to the gvm group. Each user of the gvm group can manipulate the Vulnerability Test (VT) scripts (.nasl files). These scripts are run with root privileges and therefore can be used for exploits. See https://csal.medium.com/pentesters-tricks-local-privilege-escalation-in-openvas-fe933d7f161f.
echo "%gvm ALL = NOPASSWD: /usr/local/sbin/openvas" | sudo tee /etc/sudoers.d/gvm \
&& sudo chmod 0440 /etc/sudoers.d/gvm
sudo visudo

...

# Allow /usr/local path
Defaults    secure_path = /sbin:/bin:/usr/sbin:/usr/bin:/usr/local/sbin:/usr/local/bin

# allow users of the gvm group run openvas
%gvm ALL = NOPASSWD: /usr/local/sbin/openvas
Setting up PostgreSQL
The PostgreSQL database management system is used as a central storage for user and scan information. gvmd connects to a PostgreSQL database and queries the data. This database must be created and configured.
sudo apt install -y postgresql
sudo dnf install -y postgresql-server postgresql-contrib
If necessary the PostgreSQL database server needs to be started manually
sudo systemctl start postgresql@15-main
sudo systemctl start postgresql@16-main
sudo postgresql-setup --initdb --unit postgresql
sudo systemctl start postgresql
For setting up the PostgreSQL database it is required to become the postgres user.
sudo -u postgres bash
cd
createuser -DRS gvm
createdb -O gvm gvmd
psql gvmd -c "create role dba with superuser noinherit; grant dba to gvm;"

exit
Setting up an Admin User
For accessing and configuring the vulnerability data, an administrator user needs to be created. This user can log in via the Greenbone Security Assistant (GSA) web interface. They will have access to all data and will later be configured to act as the Feed Import Owner.
/usr/local/sbin/gvmd --create-user=admin
The new administrator user’s password is printed on success. An administrator user can later create further users or administrators via the GSA web interface.
To create the administrator user with a password of your choice instead of the generated password, the following command can be used:
/usr/local/sbin/gvmd --create-user=admin --password='<password>'
Note
Please be aware if your password includes special characters like $ it needs
to be quoted in single quotes.
If the output doesn’t show
you need to look at the /var/log/gvm/gvmd.log for errors.
Setting the Feed Import Owner
Certain resources that were previously part of the gvmd source code are now shipped via the feed. An example is the scan configuration “Full and Fast”.
Currently every resource needs an owner to apply the permissions and manage the access to the resources.
Therefore, gvmd will only create these resources if a Feed Import Owner is configured. Here the previously created admin user will be used as the Feed Import Owner.
/usr/local/sbin/gvmd --modify-setting 78eceaec-3385-11ea-b237-28d24461215b --value `/usr/local/sbin/gvmd --get-users --verbose | grep admin | awk '{print $2}'`
Setting up Services for Systemd
Systemd is used to start the daemons ospd-openvas, openvasd, gvmd and gsad. Therefore, service files are required.
cat << EOF > $BUILD_DIR/ospd-openvas.service
[Unit]
Description=OSPd Wrapper for the OpenVAS Scanner (ospd-openvas)
Documentation=man:ospd-openvas(8) man:openvas(8)
After=network.target networking.service redis-server@openvas.service openvasd.service
Wants=redis-server@openvas.service openvasd.service
ConditionKernelCommandLine=!recovery

[Service]
Type=exec
User=gvm
Group=gvm
RuntimeDirectory=ospd
RuntimeDirectoryMode=2775
PIDFile=/run/ospd/ospd-openvas.pid
ExecStart=/usr/local/bin/ospd-openvas --foreground --unix-socket /run/ospd/ospd-openvas.sock --pid-file /run/ospd/ospd-openvas.pid --log-file /var/log/gvm/ospd-openvas.log --lock-file-dir /var/lib/openvas --socket-mode 0o770 --notus-feed-dir /var/lib/notus/advisories
SuccessExitStatus=SIGKILL
Restart=always
RestartSec=60

[Install]
WantedBy=multi-user.target
EOF
sudo cp -v $BUILD_DIR/ospd-openvas.service /etc/systemd/system/
cat << EOF > $BUILD_DIR/gvmd.service
[Unit]
Description=Greenbone Vulnerability Manager daemon (gvmd)
After=network.target networking.service postgresql.service ospd-openvas.service
Wants=postgresql.service ospd-openvas.service
Documentation=man:gvmd(8)
ConditionKernelCommandLine=!recovery

[Service]
Type=exec
User=gvm
Group=gvm
PIDFile=/run/gvmd/gvmd.pid
RuntimeDirectory=gvmd
RuntimeDirectoryMode=2775
ExecStart=/usr/local/sbin/gvmd --foreground --osp-vt-update=/run/ospd/ospd-openvas.sock --listen-group=gvm
Restart=always
TimeoutStopSec=10

[Install]
WantedBy=multi-user.target
EOF
sudo cp -v $BUILD_DIR/gvmd.service /etc/systemd/system/
cat << EOF > $BUILD_DIR/gsad.service
[Unit]
Description=Greenbone Security Assistant daemon (gsad)
Documentation=man:gsad(8) https://www.greenbone.net
After=network.target gvmd.service
Wants=gvmd.service

[Service]
Type=exec
User=gvm
Group=gvm
RuntimeDirectory=gsad
RuntimeDirectoryMode=2775
PIDFile=/run/gsad/gsad.pid
ExecStart=/usr/local/sbin/gsad --foreground --listen=127.0.0.1 --port=9392 --http-only
Restart=always
TimeoutStopSec=10

[Install]
WantedBy=multi-user.target
Alias=greenbone-security-assistant.service
EOF
sudo cp -v $BUILD_DIR/gsad.service /etc/systemd/system/
cat << EOF > $BUILD_DIR/openvasd.service
[Unit]
Description=OpenVASD
Documentation=https://github.com/greenbone/openvas-scanner/tree/main/rust/openvasd
ConditionKernelCommandLine=!recovery
[Service]
Type=exec
User=gvm
RuntimeDirectory=openvasd
RuntimeDirectoryMode=2775
ExecStart=/usr/local/bin/openvasd --mode service_notus --products /var/lib/notus/products --advisories /var/lib/notus/advisories --listening 127.0.0.1:3000
SuccessExitStatus=SIGKILL
Restart=always
RestartSec=60
[Install]
WantedBy=multi-user.target
EOF
sudo cp -v $BUILD_DIR/openvasd.service /etc/systemd/system/
Afterwards, the services need to be activated and started.
sudo systemctl daemon-reload
Performing a Feed Synchronization
For the actual vulnerability scanning, Vulnerability Test scripts, security information like CVEs, port lists and scan configurations are required. All this data is provided by the Greenbone Community Feed and should be downloaded initially before starting the services.
A synchronization always consists of two parts:
Downloading the changes via rsync
Loading the changes into memory and a database by a daemon
Both steps may take a while, from several minutes up to hours, especially for the initial synchronization. Only if both steps are finished, the synchronized data is up-to-date and can be used.
The first step is done via the greenbone-feed-sync script. The second step is done automatically when the daemons are started.
Downloading the Data
Note
Downloading the data during the synchronization may take a while depending on the network connection and server resources.
The downloaded data consist of four different kind of data:
VT data
SCAP data
CERT data
GVMD data
VT data contain .nasl and .notus files for creating results
during a vulnerability scan. The .nasl files are processed by the OpenVAS
Scanner and the .notus files by the Notus Scanner.
SCAP data contains CPE and CVE information.
CERT data contain vulnerability information from the German DFN-CERT and CERT-Bund agencies.
GVMD data (or also called “data objects”) are scan configurations, compliance policies, port lists and report formats.
sudo /usr/local/bin/greenbone-feed-sync
Starting the Greenbone Community Edition Services
Important
When the feed content has been downloaded, the new data must be loaded by the corresponding daemons. This may take several minutes up to hours, especially for the initial loading of the data. Without loaded data, scans will contain incomplete and erroneous results.
After starting the Greenbone Community Edition services via systemd, the running daemons will pick up the feed content and load the data automatically.
Warning
Please be aware, even if the systemctl start commands are returning immediately, the first startup of the services may take several minutes or even hours!
sudo systemctl start ospd-openvas
sudo systemctl start gvmd
sudo systemctl start gsad
sudo systemctl start openvasd
sudo systemctl enable ospd-openvas
sudo systemctl enable gvmd
sudo systemctl enable gsad
sudo systemctl enable openvasd
sudo systemctl status ospd-openvas
sudo systemctl status gvmd
sudo systemctl status gsad
sudo systemctl status openvasd
Vulnerability Tests Data
If the log file of ospd-openvas (/var/log/gvm/ospd-openvas.log)
contains the following output, the OpenVAS Scanner starts to load the new VT
data:
Loading VTs. Scans will be [requested|queued] until VTs are loaded. This may
take a few minutes, please wait ...
The loading of the VT data is finished if the following log message can be found:
Finished loading VTs. The VT cache has been updated from version X to Y.
After the scanner is aware of the VT data, the data will be requested by gvmd. This
will result in the following log message in /var/log/gvm/gvmd.log:
OSP service has different VT status (version X) from database (version (Y), Z VTs). Starting update ...
When gvmd has finished loading all VTs, the following message appears:
Updating VTs in database ... done (X VTs).
SCAP Data
gvmd starts loading the SCAP data containing CPE and CVE
information when the following message can be found in the logs
(/var/log/gvm/gvmd.log):
update_scap: Updating data from feed
The SCAP data is loaded and the synchronization is finished when the (gvmd) log contains the following message:
update_scap_end: Updating SCAP info succeeded
CERT Data
gvmd starts loading the CERT data containing DFN-CERT and CERT-Bund advisories
when the following message can be found in the logs (/var/log/gvm/gvmd.log):
sync_cert: Updating data from feed
The CERT data is loaded and the synchronization is finished when the (gvmd) log contains the following message:
sync_cert: Updating CERT info succeeded.
GVMD Data
The log (/var/log/gvm/gvmd.log) contains several messages when the gvmd
data is loaded. For port lists, these messages are similar to:
Port list All IANA assigned TCP (33d0cd82-57c6-11e1-8ed1-406186ea4fc5) has been created by admin
For report formats:
Report format XML (a994b278-1f62-11e1-96ac-406186ea4fc5) has been created by admin
Hint
Scan Configs can only be loaded if the VT data is available in gvmd and a Feed Import Owner is set.
For scan configs:
Scan config Full and fast (daba56c8-73ec-11df-a475-002264764cea) has been created by admin
Starting the Vulnerability Management
After the services have started and all data has been loaded, the Greenbone Security Assistant web interface – GSA – can be opened in the browser.
xdg-open "http://127.0.0.1:9392" 2>/dev/null >/dev/null &
The browser will show the login page of GSA and after using the credentials created in the Setting Up an Admin User chapter, it is possible to start with the vulnerability scanning.
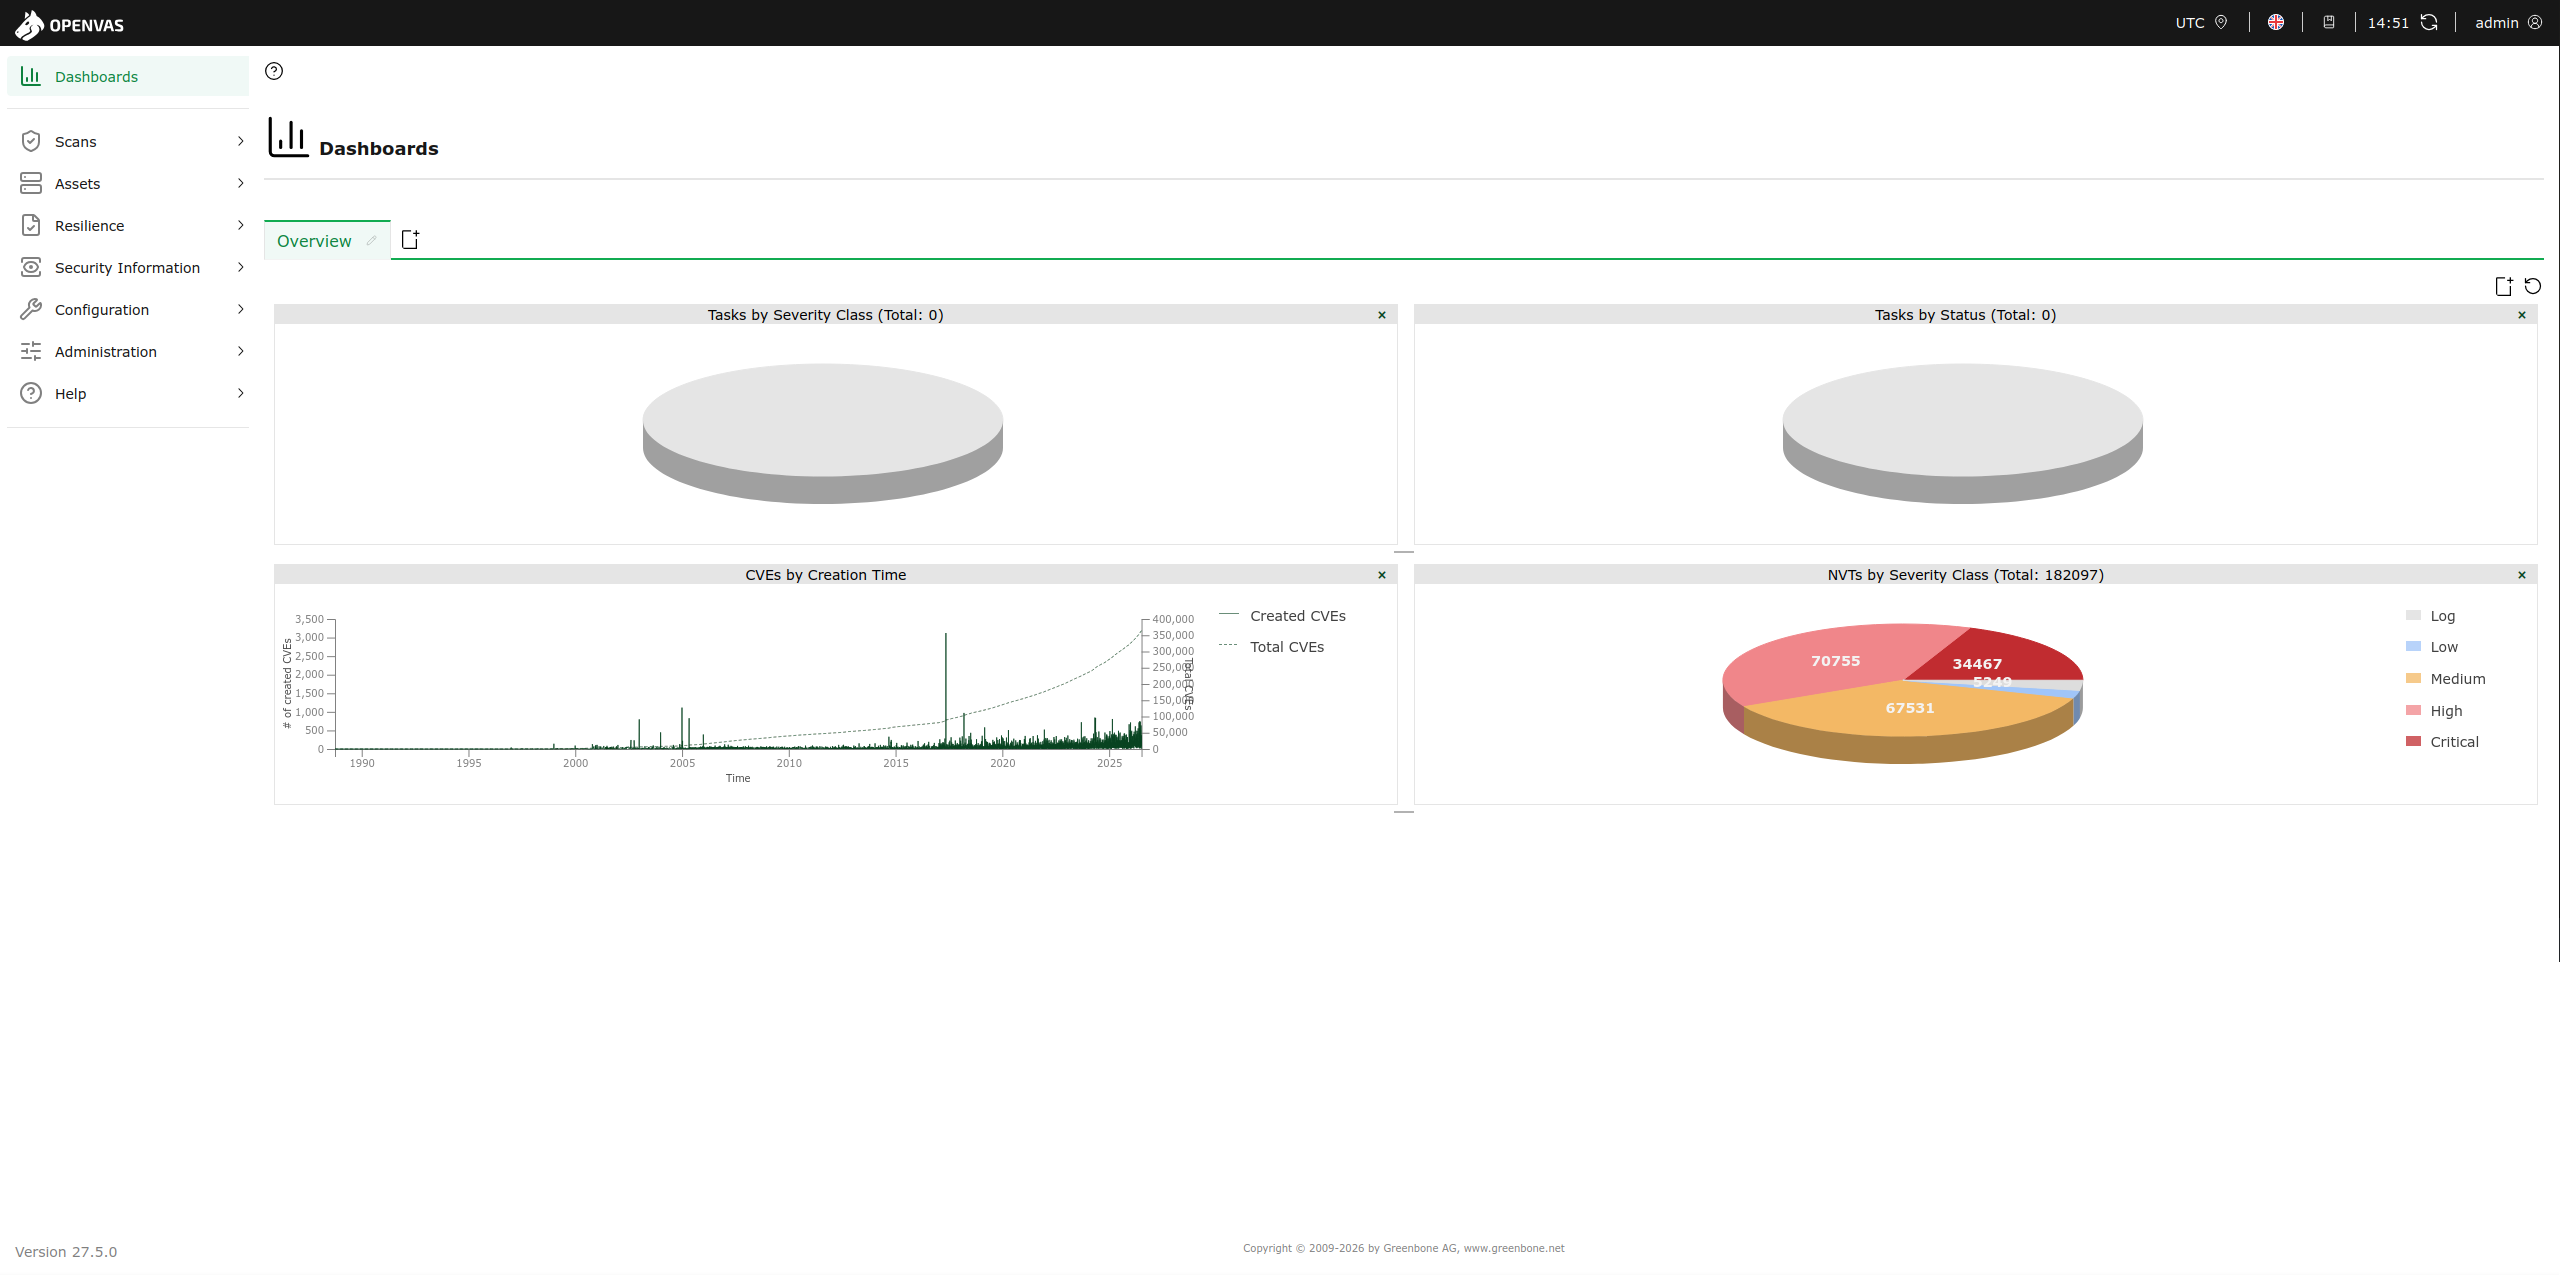
Greenbone Security Assistant after logging in for the first time